how to install metal studs
How to install metal studs
How to install metal studs

This diy step by step article is about how to install metal studs. In most of the cases the walls and ceilings are built based on wood studs, but in the past years due to technological improvements, metal studs framing have gained market share. First of all, installing metal studs is easier than installing wood studs, provided you use the right tools and techniques, as the metal studs are lighter than regular wood studs.
Just imagine you have to install a ceiling frame by yourself: it would be impossible to pull it through if you use wood studs. Next, the metal studs are very strong and durable, there don't get rot if exposed to moisture. In order to fasten the metal studs to the house structure, you have to use screws designed for this job. Using regular studs to frame the tracks represents a common mistake for most diy-ers who aren't accustomed to working with metal studs.
In order to install metal studs, you have to install first a metal track by using screws designed for this job. Next you can install metal studs in the tracks to finish the framing. Make sure the metal studs are installed properly and you maintain the same distance between them. Always ask a professional before starting the project on your own, as there are a lot of aspects that should be taken into account.
Made from this plan
Materials
- Metal studs and tracks
- Screws
- Metal brackets
Tools
- Safety gloves, Eye protection
- Measurement tape, Carpentry pencil
- Drill machinery with hammering function
- Electric screwdriver, Hammer
- Aviation snips, Ladder (if framing metal stud ceiling)
Tips
- Use a laser level to make sure the ceiling will be perfectly level
- Select the metal stud dimensions according to your needs (heavy duty studs for structural walls)
Cutting Metal Studs

Cutting metal stud
First of all we have to install the metal track on the wall (in case we build metal stud ceiling) or on the floor and ceiling (if we build a metal stud wall). When installing metal tracks, you have to make sure you align them as to be perfectly level. Consequently, you have to use either a laser level or a water level, as they are both efficient.

Cutting the metal studs to bend it
If you have to bend metal studs as to install curved drywall, you can do that is a couple of ways. The first one and the easiest method is to make cuts every 2"/5 cm on each side of the metal studs, by using metal snips.
How to install metal studs

Screwing in the metal track
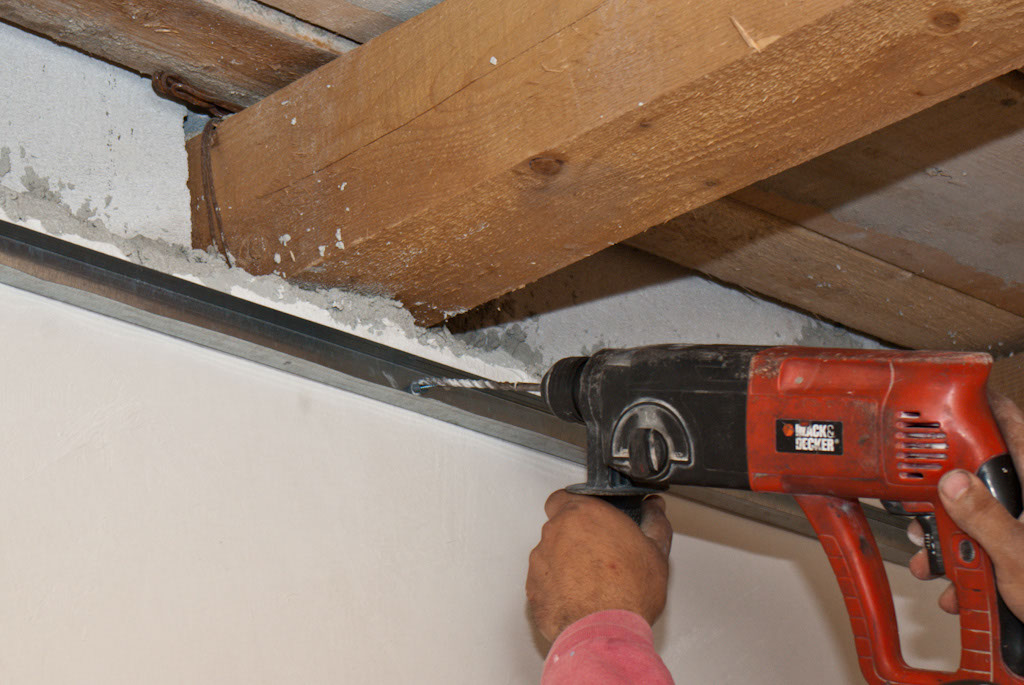
After you have cut the metal studs to the needed dimensions, and you have marked on the wall the places where have to install them, it is the time to install thew metal tracks.
Consequently, if the walls are made of bricks, you have to drill holes, install dowels and to drive in screws every 10"/25 cm. If you install the metal track on wood studs, you could drive in the screws after you have drilled holes in the metal track with a drill bit for metal.

Installing the metal stud brackets
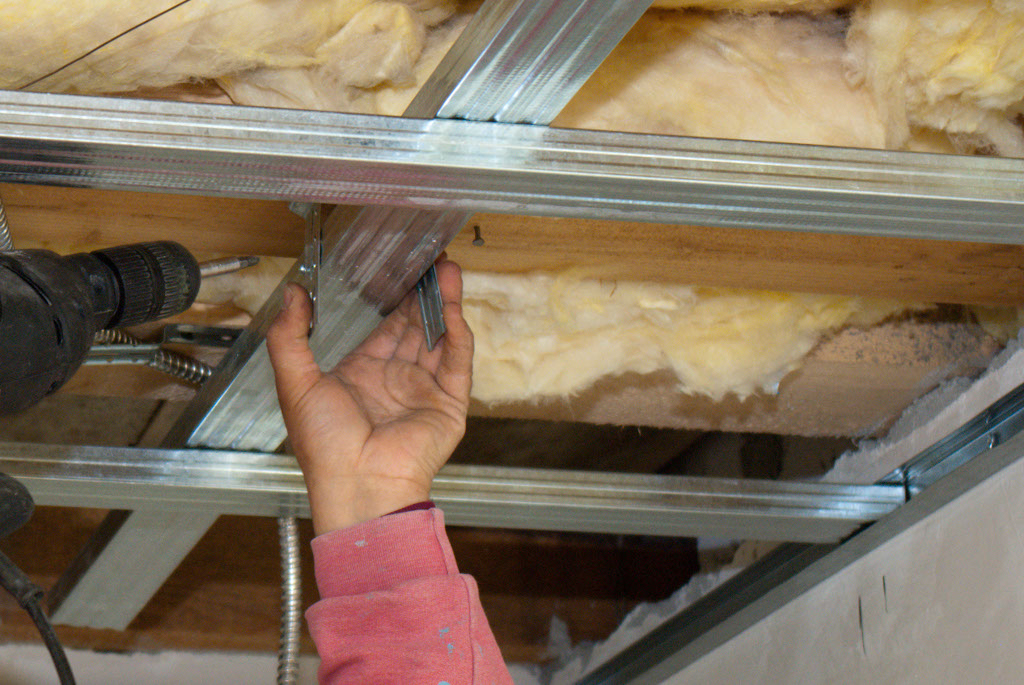
Next, we have to install the metal studs in the tracks with screws at both ends. Nevertheless, it is not enough to fasten the metal studs to the metal tracks with just screws, that is why it is essential to secure them with several brackets.

Installing metal stud network
Next, you have to straighten the ears of the brackets, along the metal studs. After you have done this, as you can see in the image, you should drive in a few screws to secure the metal stud framing properly.
Thank you for reading our article on how to install metal studs and we recommend you to share it with your friends, if you find it useful. Feel free to LIKE and SHARE our project with your friends, by using the social media widgets.
Related Posts
how to install metal studs
Source: https://howtospecialist.com/structure/how-to-install-metal-studs/
Posted by: jordanthessom.blogspot.com

0 Response to "how to install metal studs"
Post a Comment